
The Making of a container crane
(Part 2)
The boom of the crane was divided in two pieces since I wanted to make front boom movable up and down. I even made a mock up crane to find out if it would work.
It worked well until I added the tiny little detail parts
and especially the thin railing. I either had to forget the small pieces or to
abandon the idea to swing the boom up and down. Since I really liked the looks
of the thin
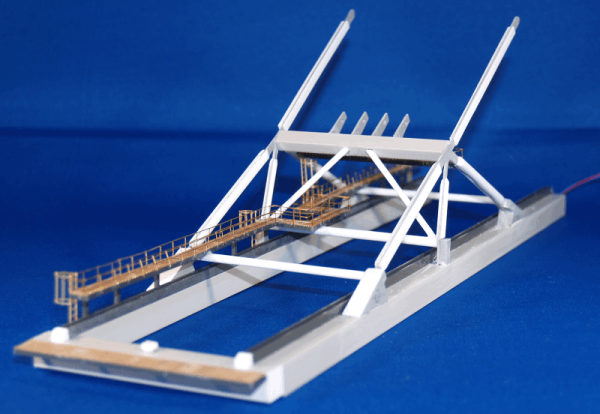
Although the boom looks complicated, it actually was
actually pretty easy to assemble. After I glued the three major pieces together,
I cut the four fingered support beam (I called it spider) out of .3 mm
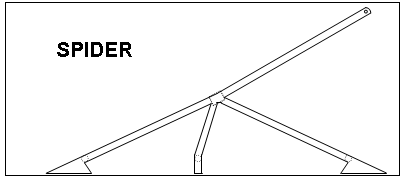
The real “spider” is made up of round and square steel
pieces, welded to the connecting points. To simulate that, I glued round and
square profiles to each side of the spider legs. This is better visible in this
picture of the supporting braces of the pillar.
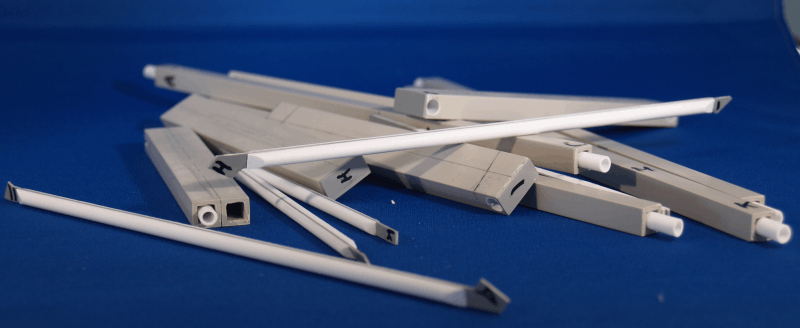
For all the profiles, I used CA glue although plastic glue
would have worked most of the time. I like CA glue since it does not “weld”
the plastic and if you make a mistake, you can separate the pieces usually with
an X-Acto knife (and I used that feature until I was a professional dissembler).
In the front I mounted a regular red
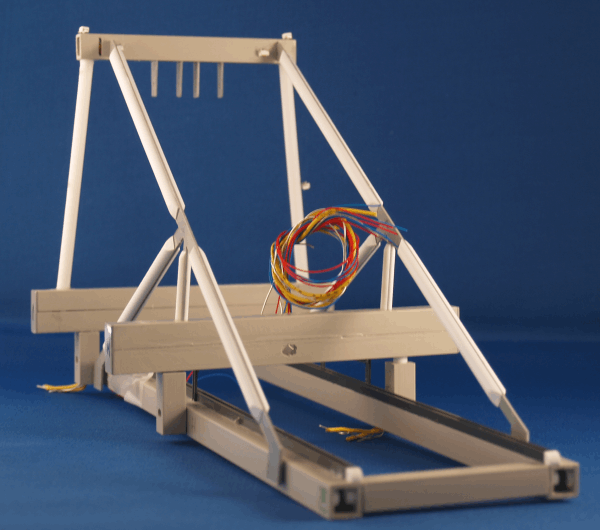
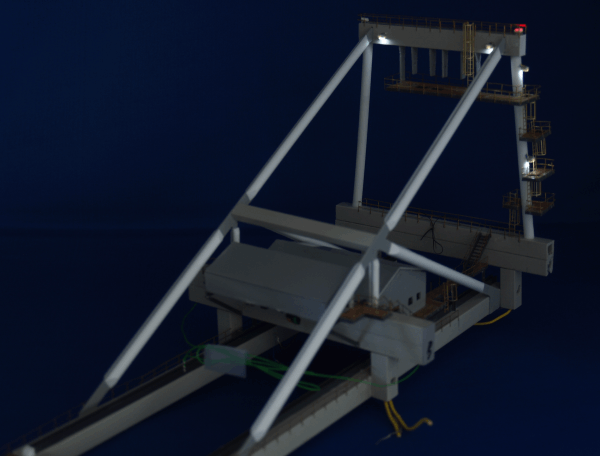
The rear boom was a little bit more challenging. Attached
to that part are the two pillars that connect the two rear spiders and the two
buildings. The pillars are angled in two different directions. The top crossbar
is smaller than the bottom and the pillars lean slightly backwards. After I made
the two back “spiders” I was ready to find the right leaning angle of the
Pillars. I must have double checked the right angle hundreds of time until I
glued it to the back boom.
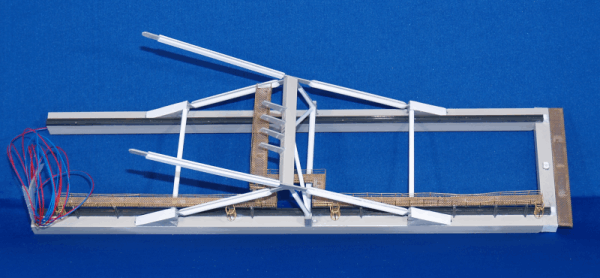
Test fit for the exact pitch backwards of the pillars with
the “spiders” in place. Since I used round tubing inside the square tubing,
I could assemble the boom without gluing the pieces for testing.
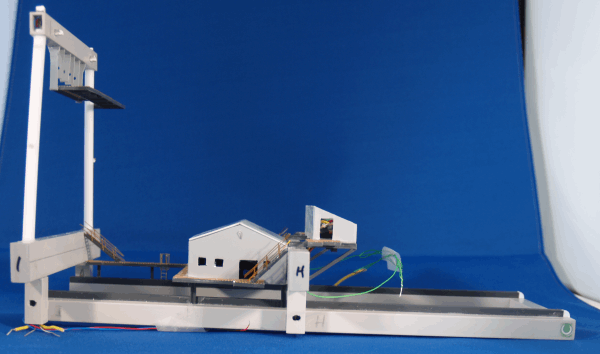
The two buildings were used for the electric part of the
crane. The bigger one was perfect for the battery and the blinking circuits I
still had from a discarded display piece of a retail store, while the smaller
one housed the resistors and three on/of sliding switches which partially stick
out underneath the building. The bigger building in the real world houses
winches for front boom but I have no idea what is inside the smaller back
building. Probably electrical parts and transformers.
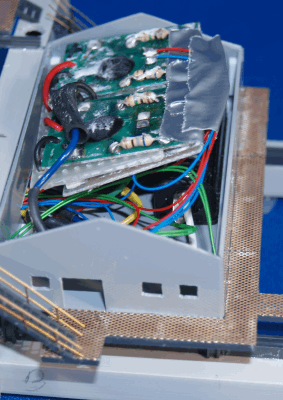
The small pillars are round tubing so that I could fit
cables in them since the upper crossbar has two blink and four flood light LEDs.
There are also two staircase lights. Each red light is connected to a separate
blinking circuit so that they don’t blink at the same time or even same
interval.
I placed a 9V round battery in the crane building that runs all the lights. The three switches in the back building operate the flood lights, the red blink lights on top of the crane and the yellow warning lights above the wheels when the crane moves sideways. Since I have the battery as a part of the crane, I don’t need any cables that go to an external power source and the crane can be moved around freely. Now I even found 5V coin battery that would have been even smaller since the LEDs don’t need more than 3.5 volts.
The first light check turned out that the red blinking LEDs are working as I hoped. All three blinker have a different pulsating speed which is really a cool effect.