The Making of a container crane

Back to Photo Page

Part 2

Part 3 (including PDF files of the blue prints)

I am in the process of building a layout situated in the San Francisco Bay Area. The semi-freelance layout will feature a container port, serviced by Southern Pacific and the local Northwestern Pacific. I imagined that the Northwestern Pacific never abandon the harbor in Tiburon and it eventually grew in a modern container facility. Half of my layout will be devoted to the harbor and I wanted a showcase piece that is not seen very often on model railroad layouts. The container crane was the perfect structure. Although I have been building models for more than thirty years, this would be my first scratchbuild model. My main source for parts was the very helpful Plastruct  http://www.plastruct.com/  company that has a great web site that makes it easy to find all the necessary parts. If you download the free pdf catalog, the search will be even easier.

After spending 2 years on the internet finding information and dimensions of a modern Post-Panamax (for larger ships that do not fit through the Panama Canal ), I stumbled on the Kalmar web site and the pictures of the newest product. I liked the shape and the fact that most of the electro cables were hidden inside the structure which gave the crane a clean and modern look. I had to compromise on the wide footprint since it did not fit with my layout space. My model is narrower than the original, I also add an old fashion staircase on the side of the crane which is not present since this modern crane has only has an elevator. Although the crane is finished, it still needs the huge wheel for the trailing cable. I just learned to photo etch with the Micro-Mark set and soon will be able to add the last piece to the crane.


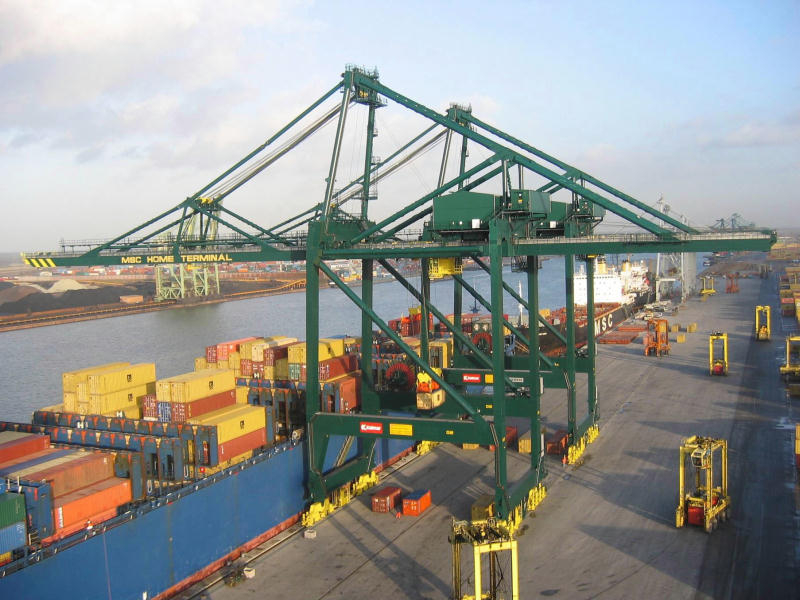
Picture copyrighted by Kalmar Industry, used with permission.


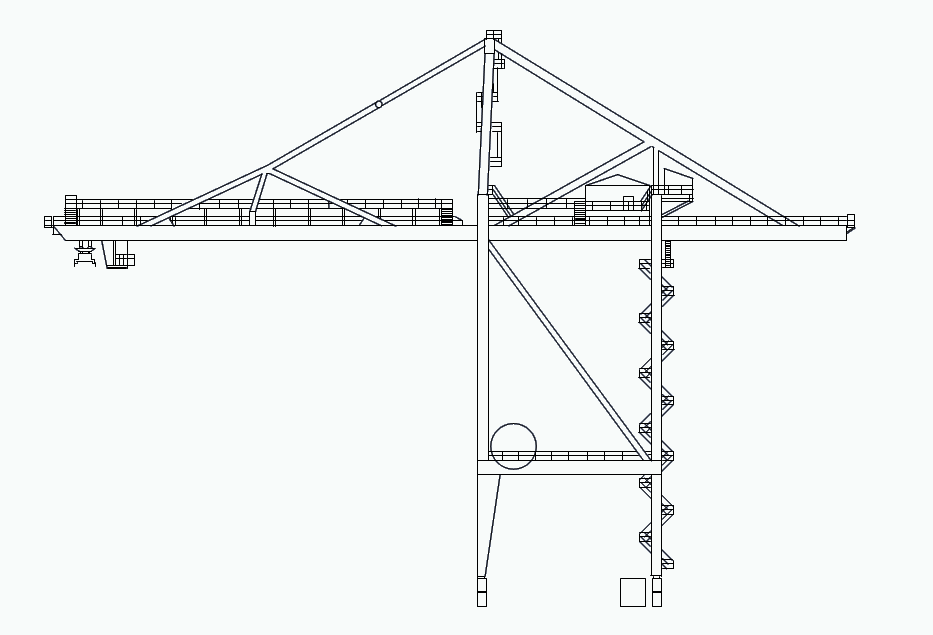
Using a drawing in one of Kalmar’s brochures I found on their website, I made a scale drawing. I had to settle for 1:200 which also made it possible to use commercially available photo etched railing pieces that were actually designed for 1:200 ship models. I broke down the crane 13 sections and drew each single detail and generated a list of pieces I needed. Here is a page of the wheel case.

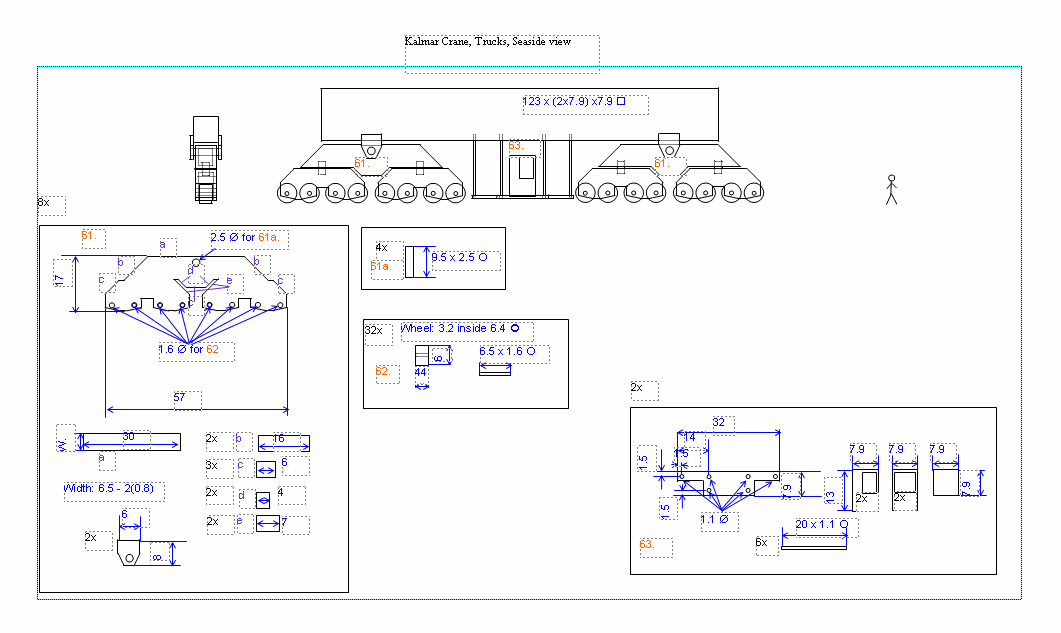
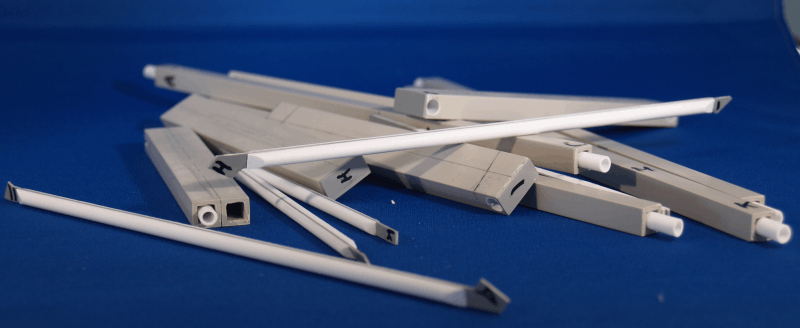
I ended up with 16 pages of drawings and 90 individual plastic and brass pieces.

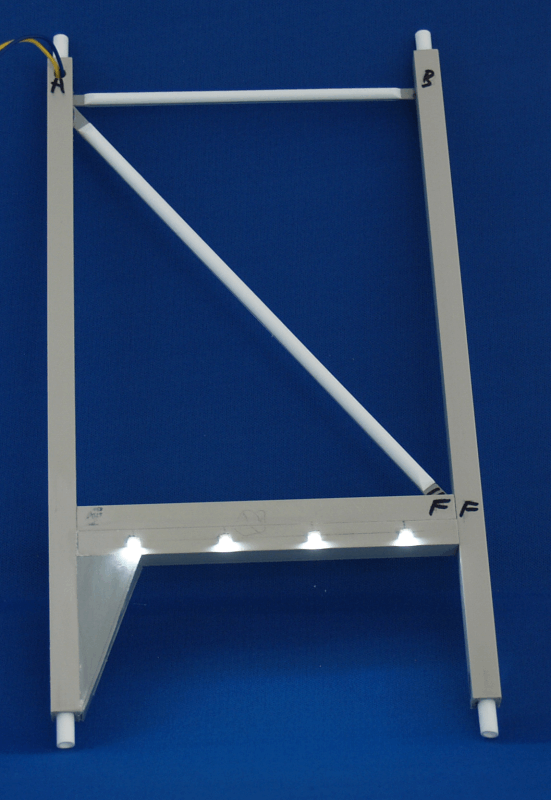
I also determined the exact locations of the LED lights so I could put wires in the round and square tubing before I glued the pieces together.

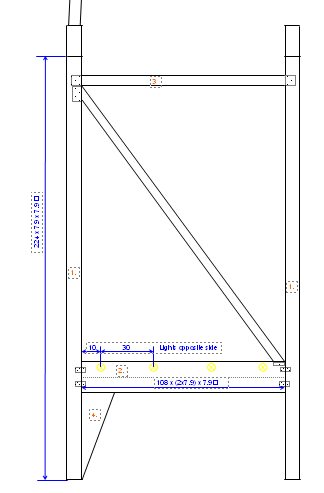
II used mostly tubing material since I could insert smaller tubing and used them as connectors.

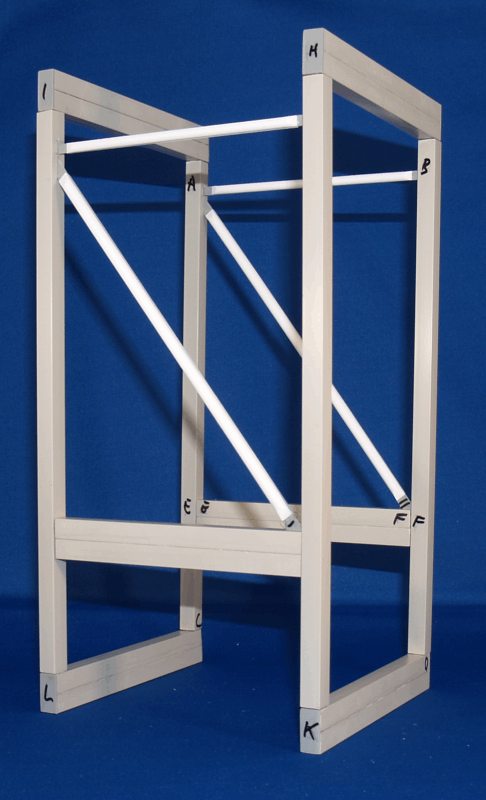
 With the connectors I was able to assemble the crane without gluing it together for test fit.

I used SMD LEDs for lights and blinkers since they are small and square with only light shining in one direction. These lights will illuminate the drop off and pick up work area underneath the crane.

Although the Kalmar crane does not have a staircase in the lower part of the crane, I just could not resist building it for my model.

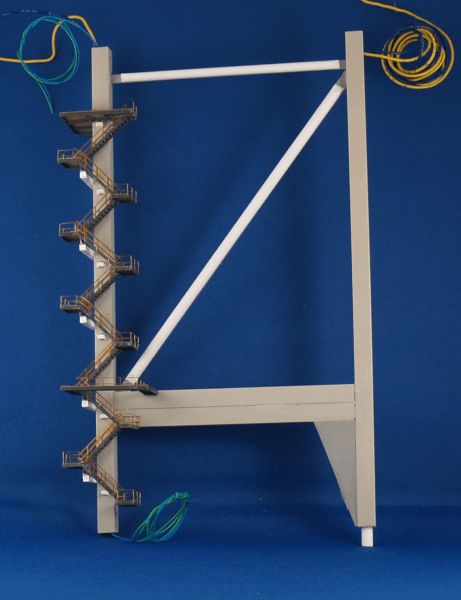
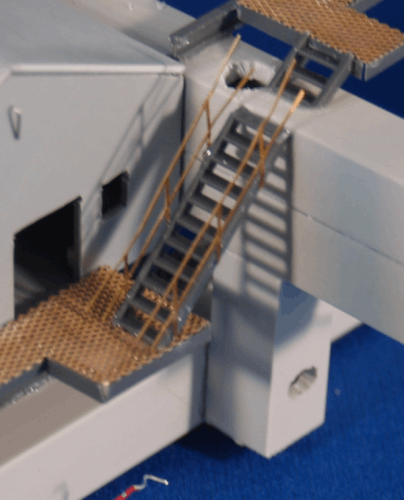
The stairs are a combination of Plastruct T and L profiles and GPM brass railing (seems to be discontinued) with K&S fine mesh for the walkways. Of course after I finished the crane,  NDetail, a German manufacturer announced those Zig-Zag stairs http://www.ndetail.de/bausatz-industrie-treppenaufgang.html as a easy to built kit. Also TrainCat Model Sales has now stairs and walkways which would have been perfect for this project http://traincat2.com/models.htm. SMD LED lights were added to light up the staircase.

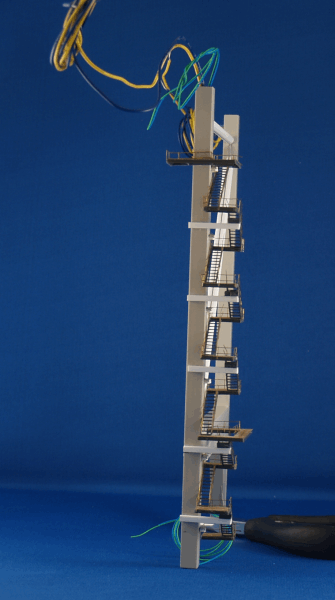
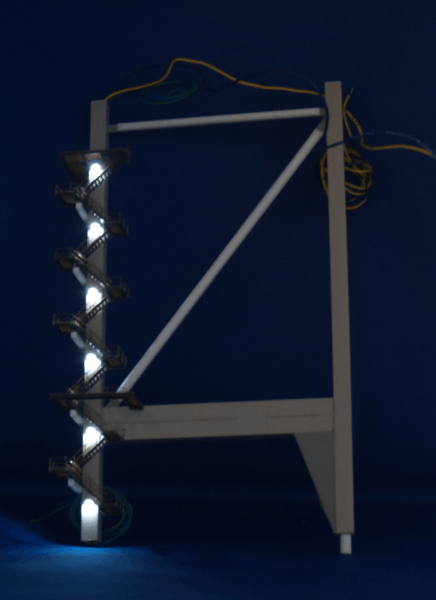
The next picture shows the different pieces of a walkway and staircase. The huge holes in the styrene profiles are for the wires from the battery (inside the building) to the lights and blinkers.


Back to Photo Page

Part 2

Part 3