Ausfahrtssignal in Zermatt aus Plastic Profilen.
Exit Signal in Zermatt made out of styrene profils.
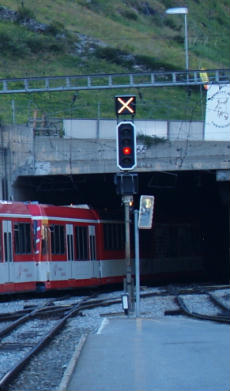
Zwei einzigartige Ausfahrtssignal stehen am Ende der Zermatter Perrons. Da kein Hersteller diese zu einem akzeptablen Preis anbietet, habe ich mich entschlossen diese selbst aus Evergreen Plastik herzustellen.
Two unique Exit Signals have been put up at the end of the passenger platforms in Zermatt. Since no manufacturer has these signals for sell to a price I could effort, I decided to build them myself out of Evergreen styrene.
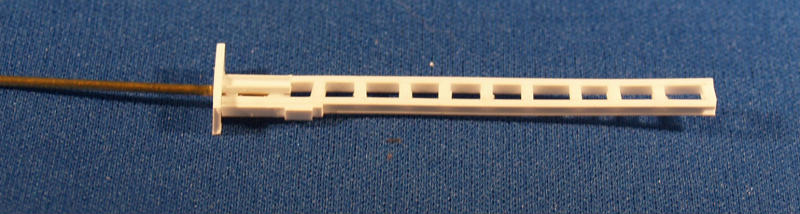
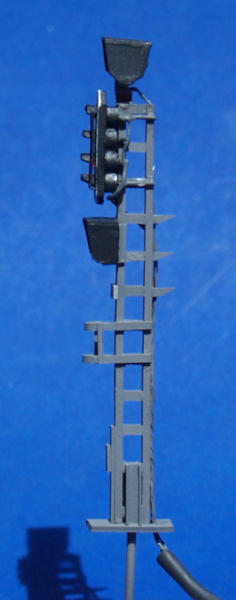
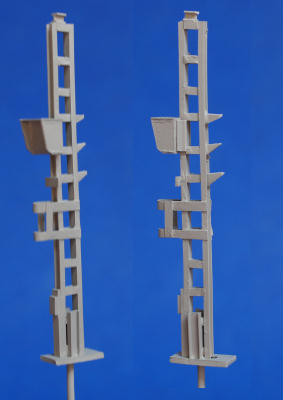
Der Signalmast besteht aus 2 U-Profilen (1.5 mm Evergreen #261) und 12 I-Profile (1.5 mm #271).
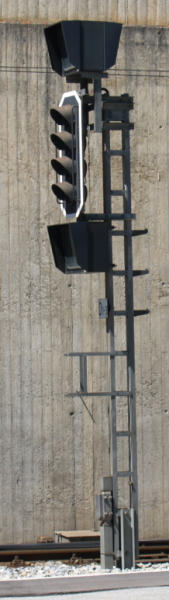
Zusätzliche U-Profile (2.0 mm #262) und Flachprofile (0.5 x 2.0 mm #124) sind am Fuss des Mastes angeklebt, gemäss Vorbildfotos des Signals D1-3 oder D4-9. Ich verwende Sekundenkleber für alle Klebearbeiten.
The mast is made of 2 U-Beams (1.5 mm Evergreen #261) and 12 I-Beams (1.5 mm #271).
Additional U-Profile (2.0 mm #262) und Dimensional Strips (0.5 x 2.0 mm #124) are attached to the foot of the mast according to the original pictures of either the Signal D1-3 or D4-9. I use Cyanopoxy glue for all my work.
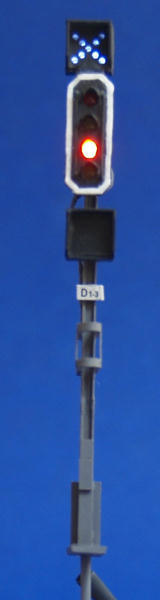
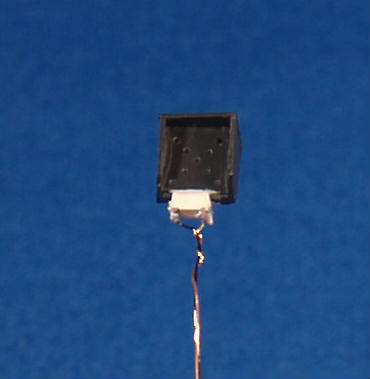
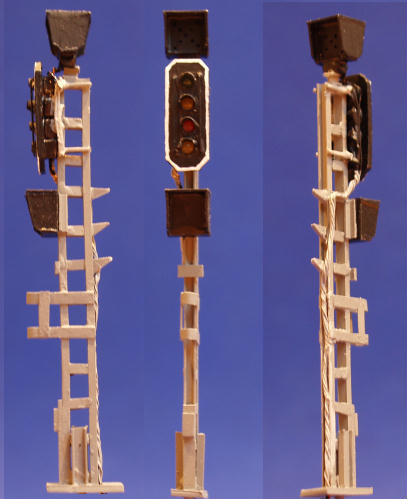
Beide Signale haben ein Rangiersignal das von beiden Seiten sichtbar ist. Ein weiteres Signal,sichtbar nur von vorne ist unterhalb des Hauptsignales angebracht. Da ich das untere Signal auf meiner Anlage nicht verwende, ist dies funktionslos.
Das Signal kann nur "Rangieren Verboten" anzeigen, da das "X" aus 9 Löchern besteht und von unten mit einem LED Beleuchtet wird.
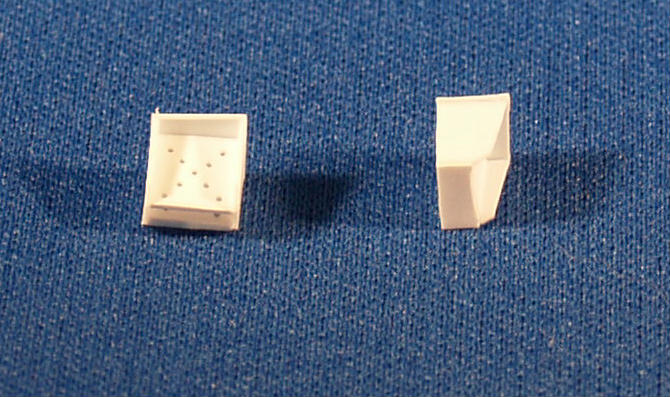
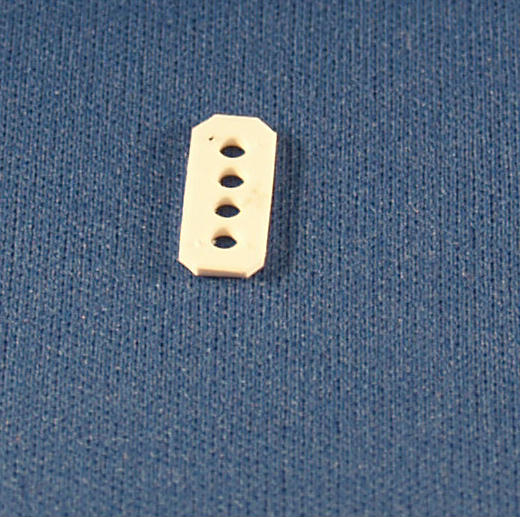
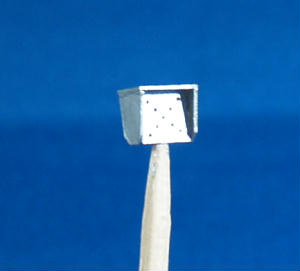
Das Rangiersignal besteht aus 5 Teilen: Die 2 Signale sind aus 0.5mm Platten (#9020) herausgeschnitten. Vorgängig habe ich die 9 Löcher gebohrt. Die Seitenwände und Deckplatte bestehen aus 0.25 mm Platten (#9010). Ich zeichne die Teile massstabgetreu im Computer und drucke die Zeichnung dann aus. Mit Klebstreifen wird das Papier auf die Platten aufgekebt und mit einem Bastelmesser herausgeschnitten.
Both signals have a switching signal on top that is readable from both sides. An additional signal is only readable from the front in is mounted underneath the main signal. Since I will not use the lower signal, it is just a "dummy".
The switching signal can only show "switching prohibited" since the "X" consists of 9 holes, which will be illuminated from below with a LED. The switching signal consist out of 5 pieces. The 2 signal faces are cut out of 0.5 mm sheets (#9020). Before I cut them out, I drilled the 9 holes. The side and top plates are made out of 0.25mm sheets (#9010). I draw the pieces on the computer and print them out, I use Scotch tape to attach the paper to the styrene sheet and cut it out with an x-acto knife.
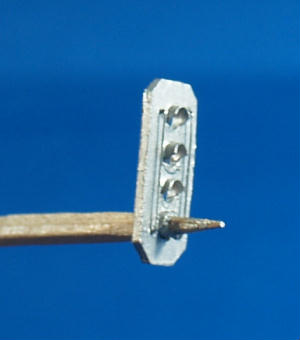
Das Hauptsignal besteht aus 0.75 mm Platte (#9030). Neben den 4 Löchern für die Signale habe ich 4 kleiner Löchern für die beiden Griffstangen gebohrt. Für die Sonnenblenden verwende ich 0.13mm Platten (#9009). Die Platte scheide ich in eine 2mm Dicken Streifen. 3 mm lange Stücke werden etwas vorgerollt und von hinten durch die Löcher geschoben, die ich zuvor mit einem Zahnstocher mit Leim behandelt habe. Nachdem alle 4 Sonnenblenden eingeleimt sind, benütze ich ein Bastelmesser für die leichte Anschrägung der Blenden.
The main signal is made out of a 0.75 sheet (#9030). Besides the 4 holes for the signals, I also drilled 4 smaller holes for the grab irons. For the sun shades I use a 0.13 sheet (#9009). The sheet is cut into a 2 mm wide strip. 3 mm long pieces are cut out of the strip. I pre-roll sun shade pieces and push them through the holes, which I touched up with some glue, using a toothpick. After everything is settled, I use my X-acto knife to cut the angle into the sun shade.
Damit das Licht er LEDs nicht seitlich entweichen kann, werden beide Signale mit silberner Modellfarbe bemalt. Modellbau Silber besteht aus Farbe und Aluminum Flocken, die ein grossartiger Lichtschutz sind.
To prevent the light of the LEDs to go astray, the Signals are painted with model paint silver. This paint has aluminum flacks in the paint which makes it a great light shield.
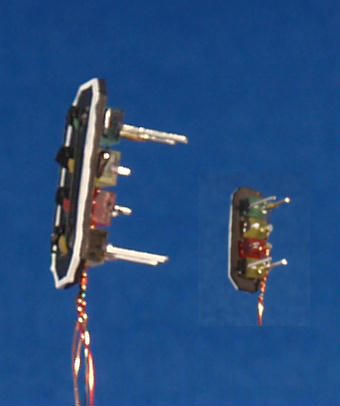
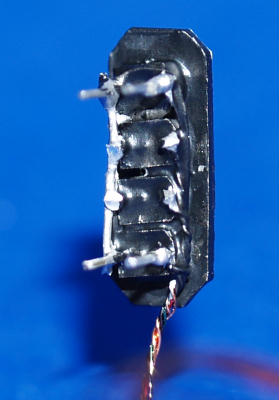
Für das Hauptsignal verwendet ich 1.8 mm LEDs. Zufälligerweise zeigen die Litzen der LEDs nach hinten und nicht zu den Seiten, somit kann ich sie gleich zur Befestigung am Masten verwenden. Alles minus Litzen weren mit einem Stück starren Draht verbunden, damit ich die Anzahl der Magnetdrähte so gering als möglich halten kann.
Das Rangiersignal erhält ein SMD LED, das unten an den Rangiersignal-Kasten geleimt wird.
Alle LEDs werden nun mit silberner Farbe behandelt, damit sie nur in die gewünschte Richtung scheinen. Nach dem Austrockenen des ersten Anstriches, schliesse ich die LEDs an und kontrolliere für gründliche Abdeckung.
For the main signal I used 1.8 mm LEDs. By accident their leads point to the back and not to the sides and I can use those leads to attach the signal to the mast. All minus wires are connected together to keep the numbers of magnet wires to a minimum.
The switching signal gets a SMD LED that is glued to the underbody of the signal box.
All LEDs will be painted with silver. After the first coat is dry, I light up the LEDs and check if the LEDs only shine in the right direction.
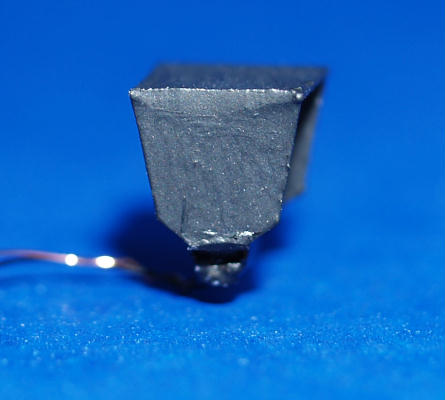
Nach der Behandlung mit Silber wird das ganze Signal nun Schwarz bemalt. Ich bemale meine Signale mit einer Pinsel. Mit einer Airbrush Pistole würde ein besser Aussehen erzielt aber dafür müsste ich die kleinen LEDs abdecken.
After the silver paint, the signals get a black overcoat. I use a hand brush to paint the signals, although an airbrush gun would get better finish but the masking of those little LEDs would be tough job.
Der Signalmast ist mit grauer Farbe bespritzt. Die Signal-Atrappe wird mit schwarzer Farbe und einem Pinsel bemalt. Glänzender Klarlack wird auf die Stirnseite der Atrappe aufgetragen, um einen "glassigen" Eindruck zu vermitteln.
The signal mast is airbrushed gray and the dummy signal painted black with a hand brush. A glossy coat will be applied to the face of the dummy signal to give it a glass look.
Die Signale sind nun mit Sekundenkelber and den Masten befestigt. Vorsichtig wird der Minusdraht des Rangiersignales and das Hauptsignal angelötet. Damit vermindere ich die Zahl der Magnetdrähte auf 6. Diese werden ineinander verdreht und so gut wie möglich versteckt und mit grau bemalt.
The signals are now attached with Cyanopoxy to the mast. Carefully I soldered the minus lead of the switching Signal to the main signal. With that I decreased the numbers of magnet wires to 6. I twisted all the wires and hide as much as possible and paint them gray.
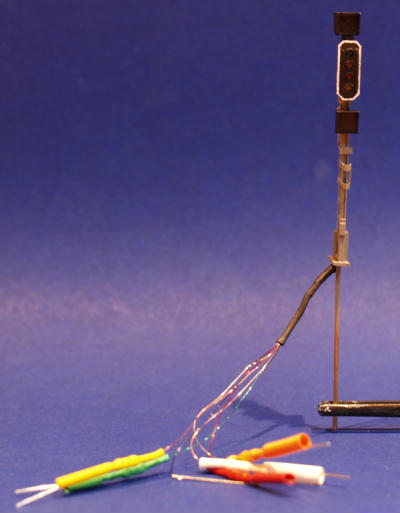
Jedes LED erhält nun ein Widerstand. Die farbigen Schrumpfschläuche haben drei Aufgaben: Sie verhindern, dass die Drähte sich berühren, verstärken den verlöteten Kontakt zwischen dem Draht und dem Widerstand und die Farben machen es einfacher beim Verdrahten unter der Anlage.
Now each LED gets a resistor. The colored shrink tubing have three chores. The make sure that the wires don't touch each other, it protects the bonding between the wires and resistors and the colors make it easier to identify the cables under the layout.