

Matterhorn Gotthard Bahn in HOm
2013
Stand Januar 2013
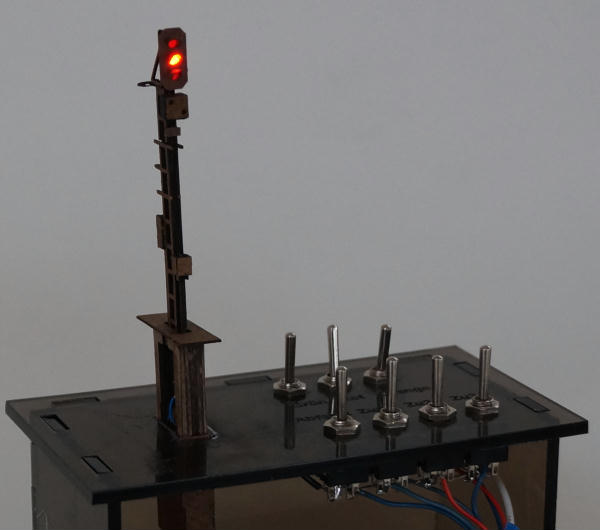
Das Ausfahrtssignal in Richtung Brig (Signal B) ist fertig und der Prototyp ist mit LED bestückt. Leider habe ich das Signaltafel verkehrt herum angeklebt und die grüne Lampe ist unten und orange ist oben. Das Signal, dass ich auf die Anlage einbauen werde, wird farbrichtig bemalt und die LEDs besser gegen sichtliches Ausstrahlen abgedeckt.
The main signal towards Brig (signal B) is finished and the prototype has now LEDs. Unfortunately I glued the signal face up-side-down and the green light is on the bottom while orange/yellow is on top. The signal I use for my layout will need to be colored and I will shield the LEDs better, so they only shine to the front.
Stand Februar 2013
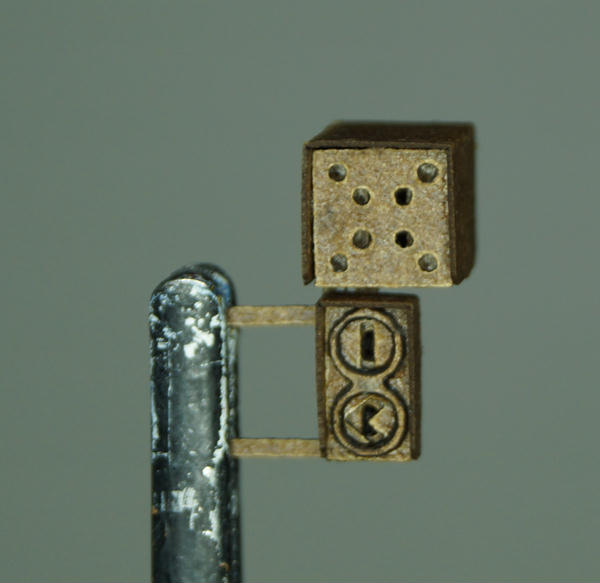
Neben dem Installieren von Weichen und Gleise im Bahnhof Visp, habe ich nun das Domino Stellpult für den Bahnhof fertiggestellt. Die einzelnen Teile werden aus zweifarbigem Acrylplatten mit dem Laser graviert und dann ausgeschnitten.
Besides installing more switches and tracks at the Visp station, I also finished the Domino switchboard for the station. For the individual pieces, I will use two colored acrylic, which I will engraved and cut with my laser.

Stand März 2013
Für das Uhr benütze ich ein billiges Hobby-Uhrwerk. Die Zeiger müssen noch verkürzt werden.
For the clock I use a cheap hobby clockwork. I still have to shorten the hands.

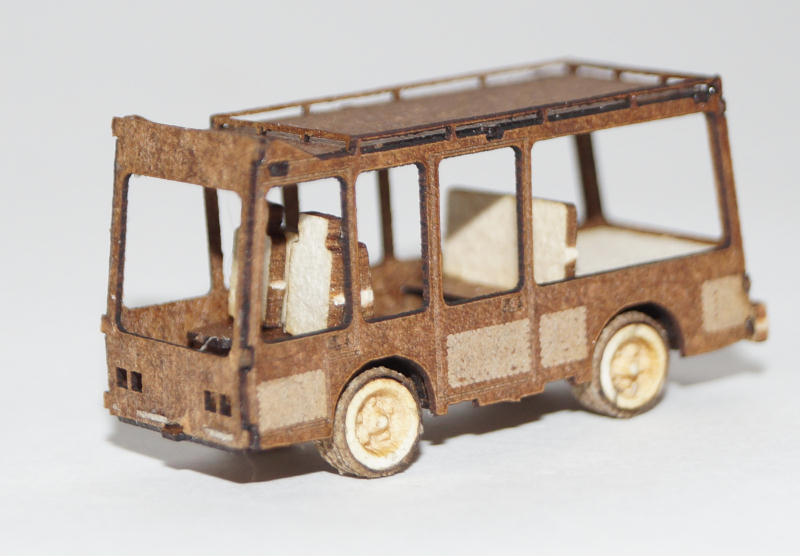
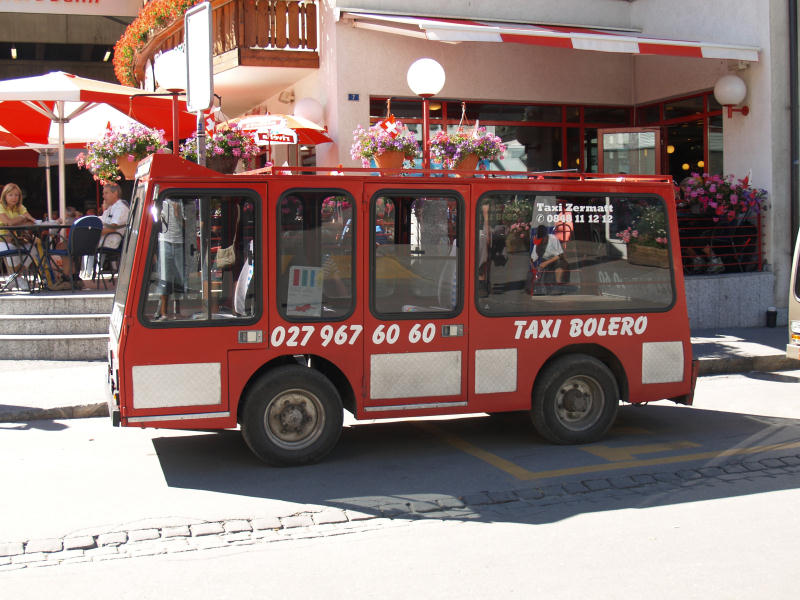
Für den Bahnhof Zermatt benötige ich eine grosse Anzahl Elektrofahrzeuge. Diese werden mit dem Laser aus Karton ausgeschnitten. Das erste Modell ist das Bolero Taxi.
For the Station in Zermatt, I need a large amount of electro cars. Those will be cut out from cardboard with my laser. First up is the taxi of the Bolero company.
Stand Juli 2013
Für einige Zeit habe ich mich damit befasst, wie ich die Signale schalten könnte. Obwohl DCC auch Signalbausteine anbietet, will ich das Signal nur mit Tastern schalten. Dies hat nicht nur den Vorteil, die Kosten zu senken, sondern auch alles etwas einfacher zu gestalten.
Als ich auf die Arduino Plattform aufmerksam gemacht worden bin, schien mir dies die Perfekt Lösung.
Für weitere Information habe ich eine Arduino Seite aufgebaut.
For some time, I was thinking about the way to control the lights of the signal . Although DCC has signal modules, I want to control them with push buttons. That has the advantage to keep the cost down, and make it easier for me.
I was made aware of the Arduino platform and it seems the perfect solution for me.
For mor information, I have build a Arduino page.
Da nun die Signal Steuerung entschieden ist, habe ich einige weitere Signale für den Bahnhof Visp hergestellt.
Since I have decide on the signal control, I designed a few additional signals for the station Visp.
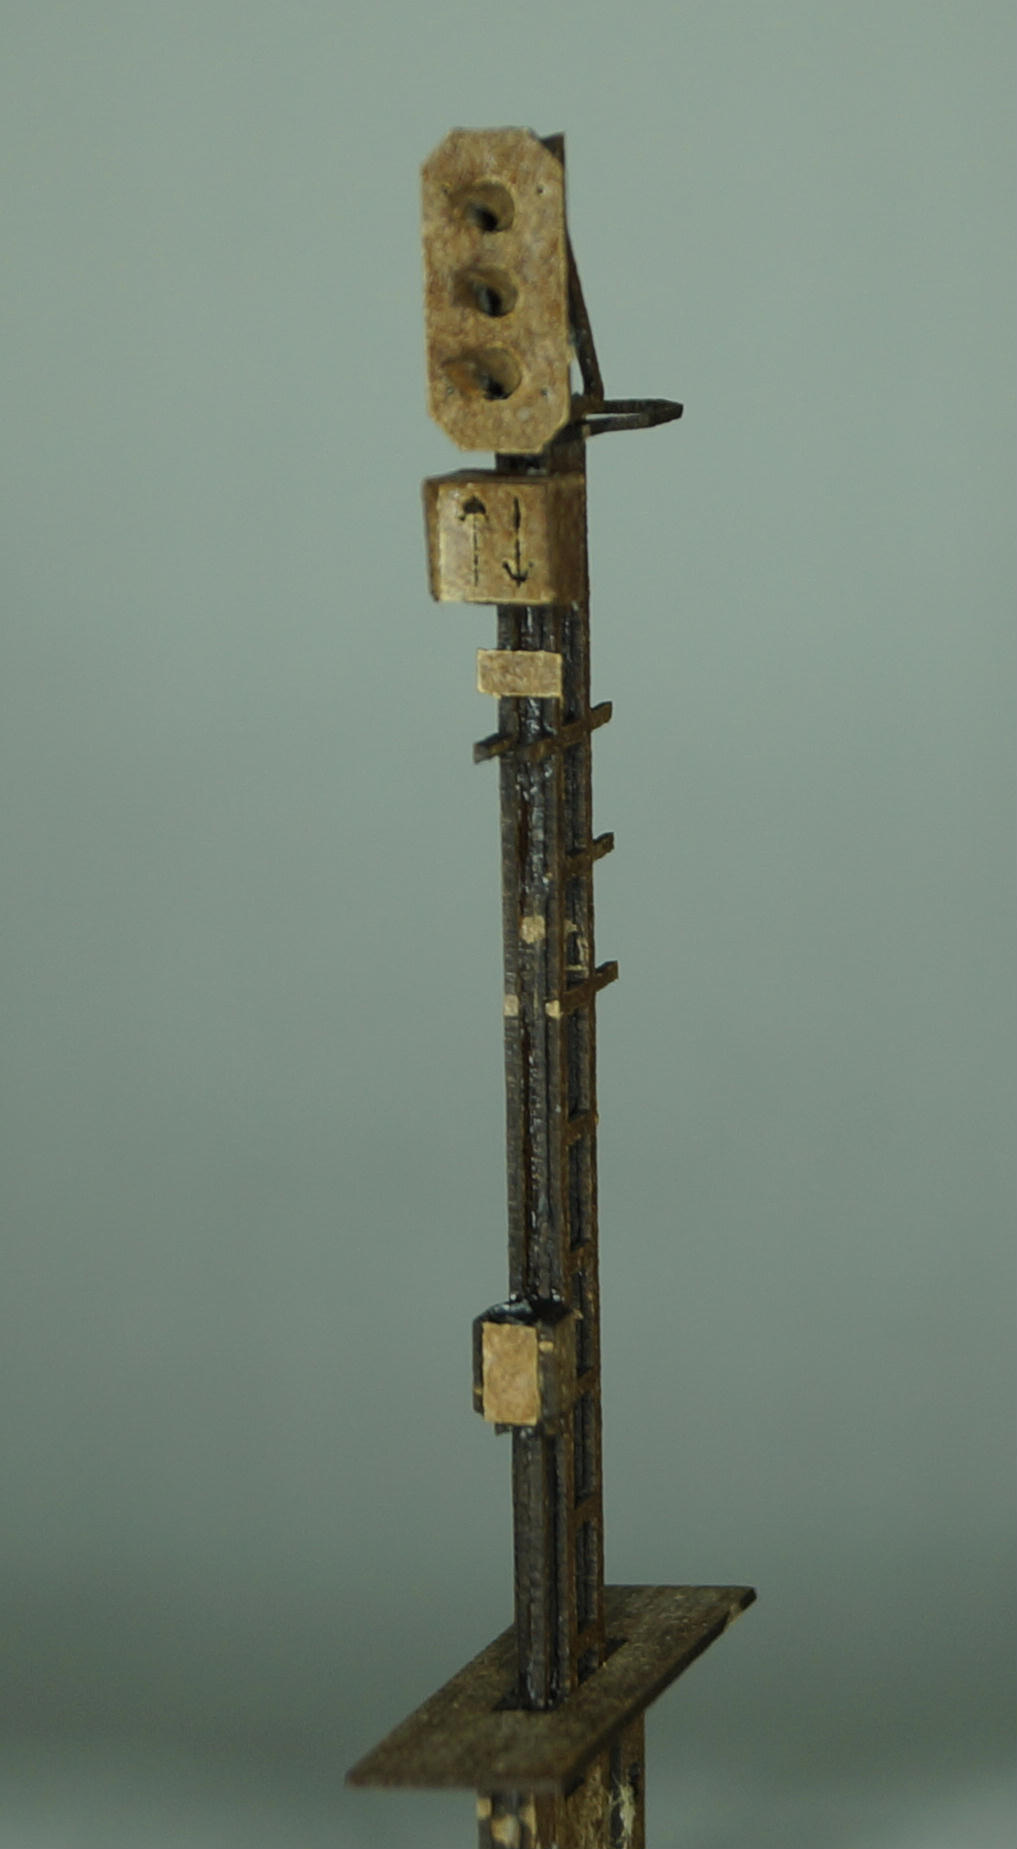
Einfahrtssignal von Brig
Main signal from Brig
Rangier- und Weichensignal vom Gleis 1 zu den Gleissen beim Frachtgebäude. Die Signalkombination wird an einem Fahrleitungsmasten befestigt.
Restricted switching and Switch signal, which is located on track one towards the tracks of the freight building. The signal combination will be attached to a cantenary mast.
Stand Oktober 2013
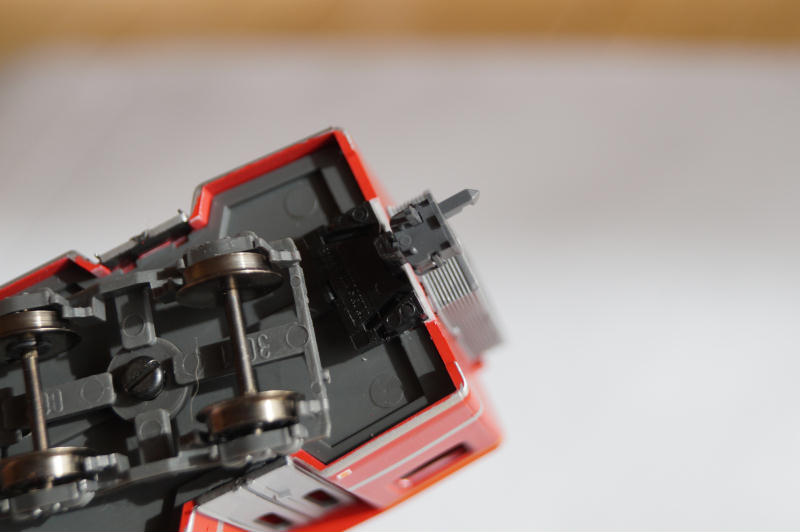
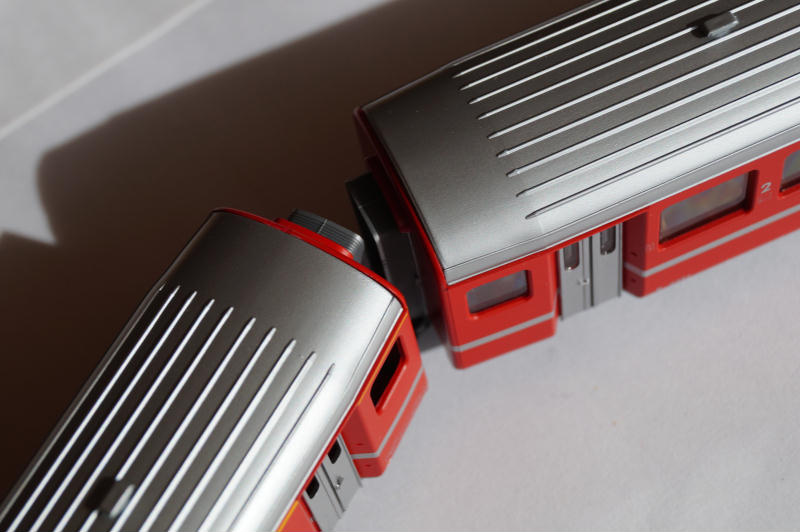
Um den sicheren Fahrbetrieb zu garantieren, habe ich begonnen einige Personenwagen auf Kurzkupplung umzubauen und dies dann auf der enstehenden Anlage zu testen. Ich habe mich (zur Zeit) entschlossen, Bemos Scharfenberg-Kupplung einzusetzen. Um ein engeres Fahren zu erreichen, befestige ich die Fleischmann-Kurzkupplungskulissen der Spur N am Fahrzeugboden. Die Schwalbenschwanz-Kupplungsaufnahme ist identisch mit der Bemo Kupplung. Da die Kulisse einen grösseren Schwenkradius hat, muss etwas Plastik am Wagenkasten weggefeilt werden. Ansonst ist keine Aenderung vorzunehmen. Am Drehgestell entferne ich den Kuppler und drehe dann das Drehgestell 180º damit die Kupplungsaufnahme nicht an der Kulisse streift. Damit bleibt das Drehgestell unberührt.
Die Bemo Scharfenberg-Kupplung werden nur für Personenwagen verwendet. Einfaches Entkuppeln auf der Anlage ist nicht nötig, da die MGB die Pendelkompositionen normalerweise nicht auseinander nimmt. Zusatzwagen werden zum Teil mit Steuerwagen am Zugsende angehängt. Der Glacier-Express ist die einzige Komposition bei welcher die Lokomotive in Zermatt abgehängt wird.
To be sure that trains run without a problem, I have been working on a short coupling system for my passenger cars and test them on the already installed tracks. I dicided (at this time) to use Bemo's Scharfenberg couplers. To get a shorter distance between the cars, I use Fleischmann's Kurzkupplungskullise (short profi coupling) in N-Scale. The ducktail of the Fleischmann coupler fits exactly Bemo's HO coupler. Because the profi coupler has a bigger radius, I had to remove some of the plastic on the end of the cars. Otherwise no changes were made on the car or trucks. After I removed the factory coupler, I turn the trucks 180º, so that the coupler box does not hit the profi coupling box.
I will use the Bemo Scharfenberg coupler only for the passenger cars. Easy uncoupling on the layout is not necessary since the MGB does not usually change the consist of the train. Temporary added cars usually come with a cab-coach and are added to the end of the train. The Glacier-Express is right now the only train, where the engine is disconnected in Zermatt.
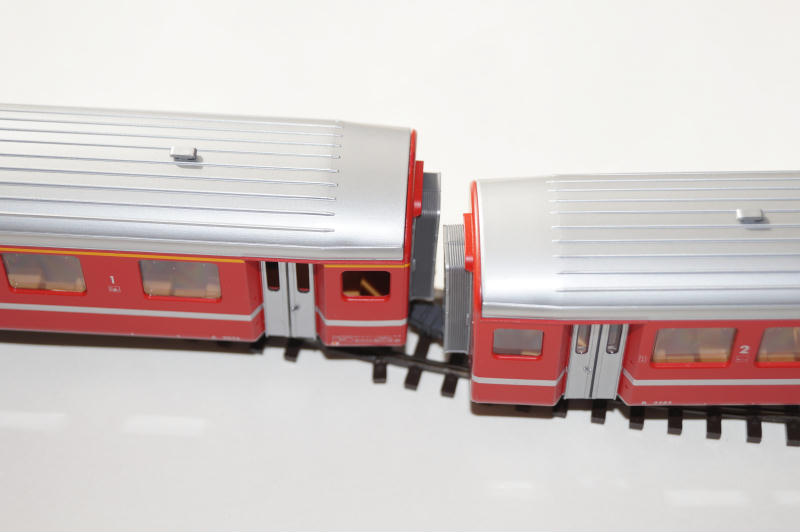
Fleischmann Kulisensteuerung (schwarz) und Bemo Scharfenberg Kupplung (grau)
Fleischmann short profi coupling box (schwarz) and Bemo Scharfenber coupler (gray)
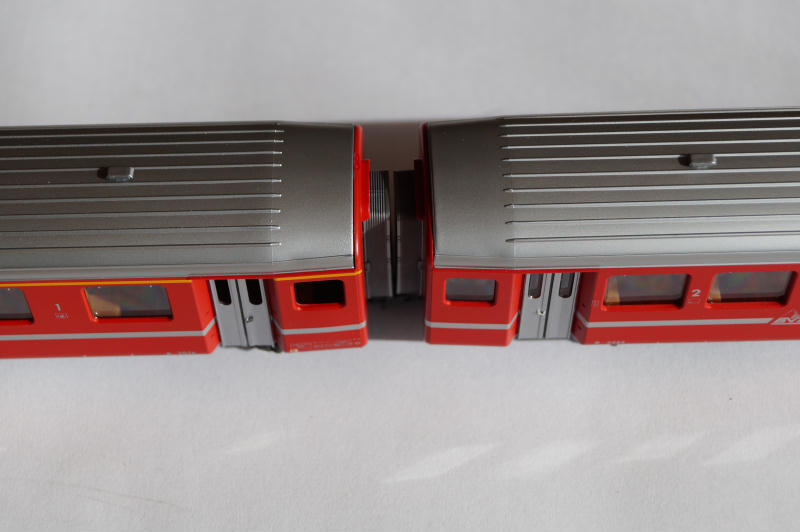
Den Abstand kann durch das plazieren der Kurszkupplungskulise am Wagenboden perfekt eingestellt werden. Dabei verwende ich Doppelklebband. Sollte das Klebband sich als sicher erweisen, werde ich auf richtigen Leim verzichten.
The distance between the cars can be adjusted by placing the short profi coupling box in the right position under the cars. I use double stick tape and if it works during operation I will not use any glue.
Test 1: Radius 380mm. Meine Anlage hat einen Minimum Radius von 500mm
Test 1: Radius 380mm. On my layout the minimum is radius 500mm
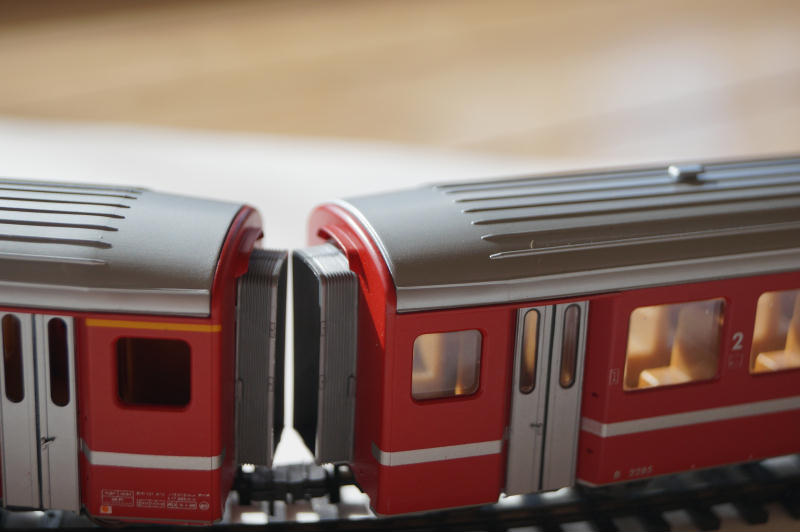
Test 2: Durchfahrt einer S-Kurve ohne gerades Zwischenstück. Auf meiner Anlage ist ein gerades Zischenstück von mindestens einer Wagenlänge vorgesehen. Die Abstellgleise im Bahnhof Visp haben solche S-Kurven aber nur kurze Güterwagen werden dort abgestellt.
Test 2: Running through an S-curve without any straight track between the curves. On my layout, I will have a straight track of minimum one car length. The yard at the Station in Visp has such S-curves but only freight trains are using it.
Stand November 2013
Für den Bahnhof Visp, müssen einige Gebäude selber hergestellt werden. Dabei ist das eigentlich Bahnhofsgebäude das aufwendigste. Für das Sandsteinfundament habe ich neben käuflichen Platten von Heki, Noch, Faller, Vollmer und Plastruct auch verschiedene Werkstoffe ausprobiert.
Vinyl-Bodenplatten sind dabei als beste Lösung hervorgetreten. Diese Bauart ist ausserordentlich billig aber sehr zeitaufwendig.

Stand Dezember 2013
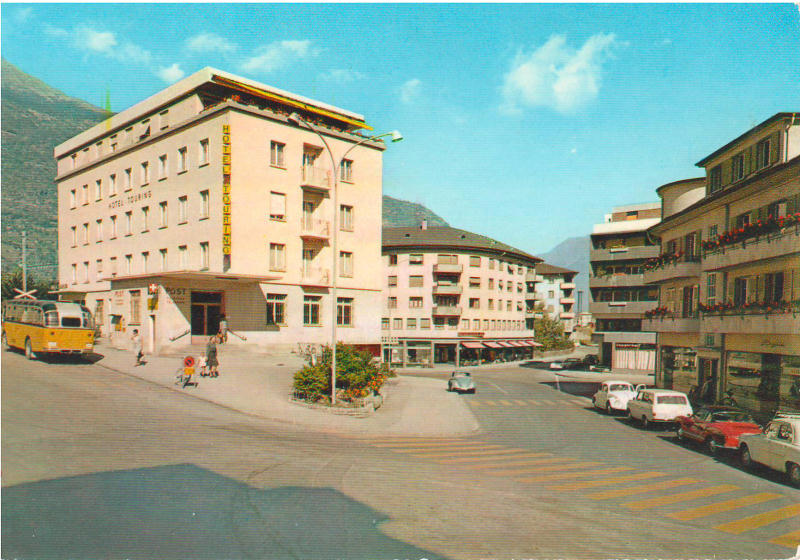
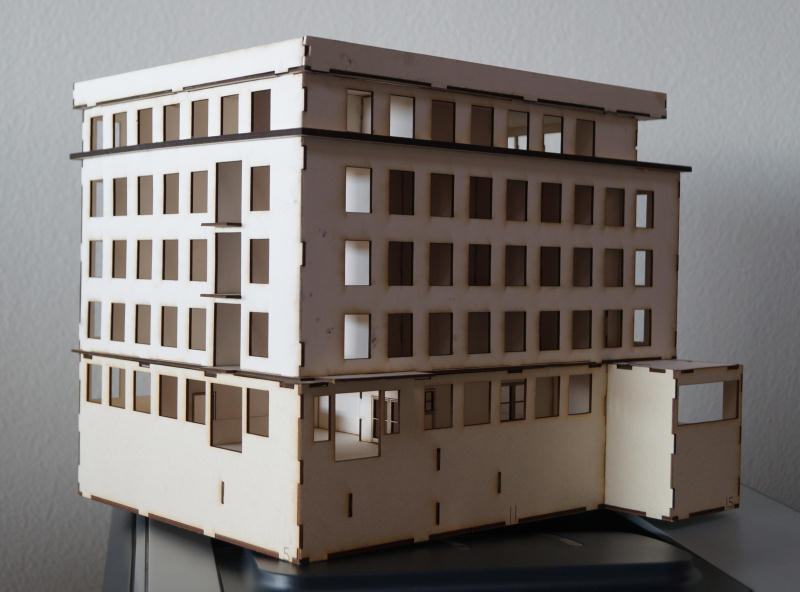
Das erste Gebäude für den Bahnhof Visp, Hotel Touring, ist im Grobbau fertig. Obwohl es nur eine einfach Form hat, war die Konstruktion mit allen Innenwände zeitaufwendiger als ich dachte. Der Einbau in die zukünftige Anlage wird auch komplizierter als die anderen Gebäude des Bahnhofareals, da es zum Teil ein Untergeschoss besitzt und an einer abfallenden Strasse steht.
Das fertige Modell wird noch eine 1mm dicke Balsaverkleidung aufweisen.
The base for the first building for the Station Visp, Hotel Touring, is done. Although it has a simple shape, it took me more time to do all the walls inside than I had imagined. To put the building into the future layout will be a little more work than the other surrounding buildings since it has partial below ground rooms on a sloping street.
The finished model will have an additional 1mm thick balsa wall on the sides.


2015